Here’s my build of AOSP (Android 12L) for Raspberry Pi 4 Model B, Pi 400, and Compute Module 4. It’s for advanced users only. Pi 4 model with at least 2GB of RAM is required to run this build.
Important! Raspberry Pi hardware specific implementation in this build is based on source code released on my Raspberry Vanilla project but this build offers various additional features and enhancements. This image includes parts that are licensed under non-commercial license (Creative Commons Attribution-NonCommercial-ShareAlike 4.0 International). You may use this build freely in personal/educational/etc use. Commercial use is not allowed with this build! You can contact me by email to discuss creating customized Android builds for commercial purposes.
Do not mirror my builds! Please post a link to this page instead.
Note! This release is discontinued from development, seriously outdated, and no longer available. Please use more recent Android releases instead.
AOSP12-20220923-KonstaKANG-rpi4.zip
md5:bb8638d06659a3f3e34245c3a232a9c0
AOSP12-20220923-KonstaKANG-rpi4-ota.zip (TWRP flashable OTA package)
md5:e4ea2e4485081f871041423e11d8bede
Working:
- Audio (HDMI, 3.5mm jack, USB microphones, bluetooth speakers/headphones, etc)
- Audio DAC (using GPIO DACs e.g. Hifiberry DAC+)
- Bluetooth (and bluetooth tethering)
- Camera (using official Pi camera modules & UVC USB webcams)
- GPIO
- GPS (using external USB modules e.g. U-Blox 7)
- Ethernet
- Hardware accelerated graphics (V3D, OpenGL & Vulkan)
- HDMI display (and HDMI-CEC)
- I2C
- IR remotes (using external GPIO IR modules e.g. TSOP4838)
- RTC (using external GPIO I2C modules e.g. DS3231)
- Sensors (using external GPIO I2C modules e.g. MPU6050, LSM6DS3, LSM303DLHC, BME280/BMP280, and APDS9930 accelerometer, gyroscope, magnetometer, temperature, pressure, humidity, ambient light, and proximity)
- Serial console (using external GPIO serial console adapters e.g. PL2303)
- SPI
- Touchscreen/multi-touch (official 7” touchscreen, USB touchscreens, Waveshare SPI touchscreens)
- USB (mouse, keyboard, storage, etc)
- USB-C (ADB, MTP, PTP, USB tethering)
- Wifi (and wifi tethering)
Not working:
- Hardware video decoding & encoding (software decoding & encoding works, option to test highly experimental H.264 hardware video decoding)
Issues:
- Camcorder (i.e. recording videos) & some third party camera apps don’t work with official Pi camera modules (works with UVC USB webcams)
- SELinux is in permissive mode
- and more…
Sources:
Thanks:
- Roman Stratiienko and GloDroid project
- Peter Yoon and android-rpi project
- AOSP reference board developers (dragonboard, hikey, yukawa)
- Android-x86 project
How to install:
- Follow the official Raspberry Pi instructions for writing the image to the SD card.
How to update:
You can also update to newer builds using TWRP flashable OTA packages.
- Download AOSP12-xxxxxxxx-KonstaKANG-rpi4-ota.zip and save it to your device’s internal storage or use an external USB drive
- Boot to TWRP recovery (see FAQ)
- Install AOSP12-xxxxxxxx-KonstaKANG-rpi4-ota.zip from your selected storage
- (Flash GApps/Magisk/other add-ons you had previously installed)
- Boot out of recovery (see FAQ)
Changes that are backed up and restored flashing OTAs:
- Device specific settings changed using Settings -> System -> Raspberry Pi settings
- Manual changes to /boot/resolution.txt and /boot/rc_keymap.txt
- USB boot configuration in /boot/config.txt
- User specific options in /boot/config_user.txt
Changes that are not backed up and restored flashing OTAs:
- Manual changes to /boot/config.txt (and any other manual changes to /boot partition)
- GApps
- Magisk
FAQ:
Q: How to find several Raspberry Pi specific settings options?
A: Settings -> System -> Raspberry Pi settings
Most options in this menu require you to reboot your device for the setting to take effect.
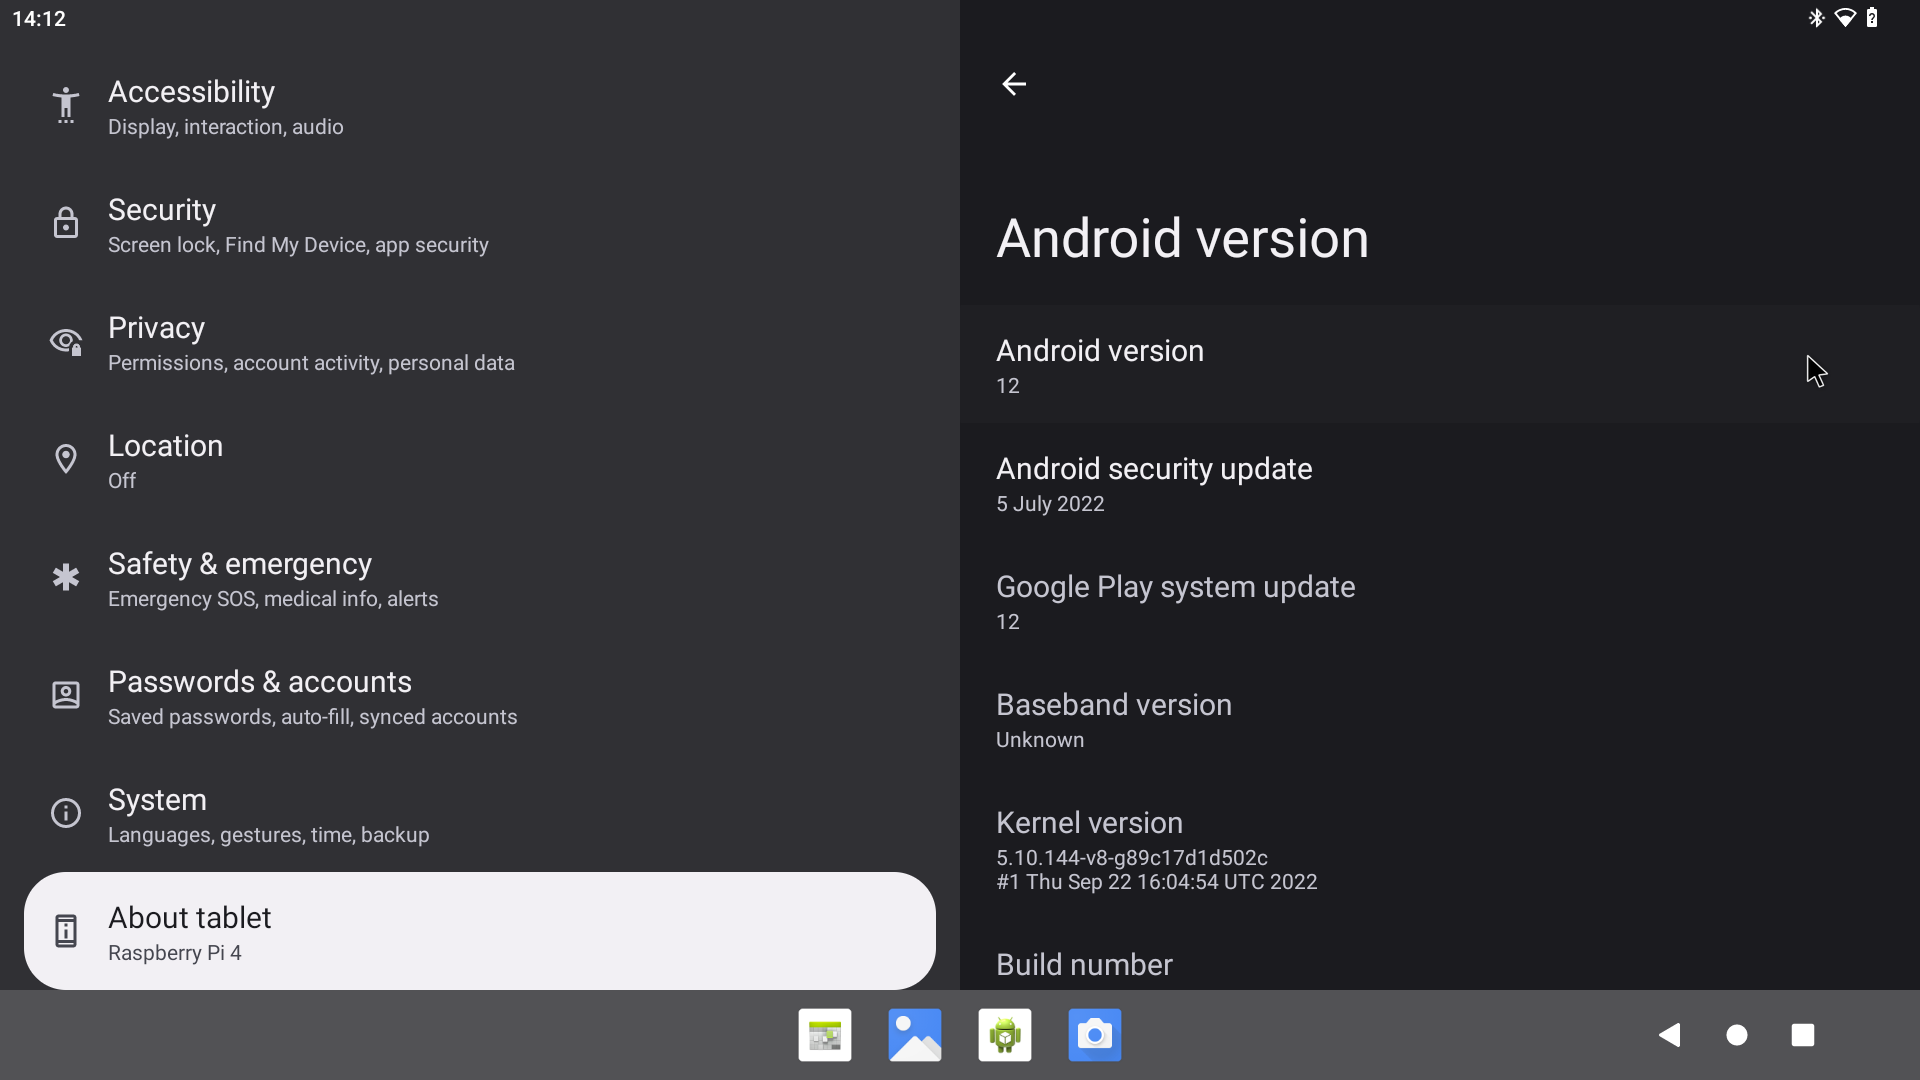
Q: How to enable developer options?
A: Settings -> About tablet -> Click ‘Build number’ several times.
Q: How to enable root access?
A: You can have root access via ADB after adb root, SSH (see FAQ below), or serial console. It is also possible to install Magisk following instructions later in the FAQ.
Q: My display is not working. I can only see the rainbow screen but no Android boot animation. What should I do?
A: This build only supports HDMI displays that report supported resolutions using EDID. 1920x1080 resolution is used by default with this build. You can change value in /boot/resolution.txt to use a different resolution that your display supports. Removing /boot/resolution.txt will use the preferred resolution of your display.
Q: How to use the official 7” DSI touchscreen display?
A: You can enable required configurations using a settings option found in Settings -> System -> Raspberry Pi settings -> Touchscreen. You need to disconnect any HDMI display when using the DSI display.
Q: Settings -> Storage shows total system size of 7 GB. There’s unallocated space on my sdcard. What should I do?
A: This is a 7 GB image, remaining space on your sdcard will remain unallocated. Easiest way to extend /data partition is to simply flash my resize zip in TWRP.
Alternative option is to use e.g. GParted and extend /data partition (/dev/block/mmcblk0p4) to cover the unallocated space.
Q: Raspberry Pi doesn’t have a power button. How to power off/reboot device?
A: Following keyboard keys work as Android buttons: F1 = Home, F2 = Back, F3 = Multi-tasking, F4 = Menu, F5 = Power, F11 = Volume down, and F12 = Volume up. You can also use one of many third party reboot applications.
Q: How to create a DIY hardware power button?
A: You can send power button events by connecting GPIO21 to ground.
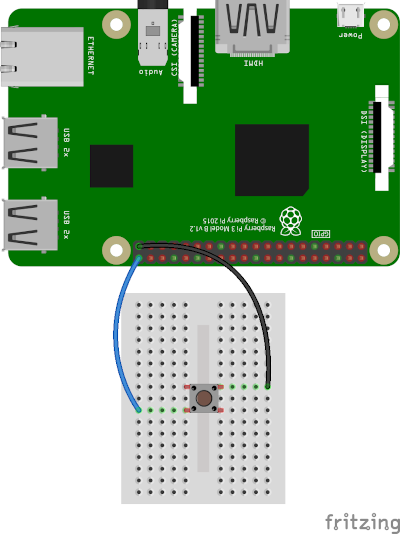
You can enable the feature by using a settings option found in Settings -> System -> Raspberry Pi settings -> Power button.
You can also use the DIY power button to boot the device to TWRP recovery. Press and hold the button while powering on the device until you see the TWRP screen.
Q: How to enable audio through HDMI?
A: 3.5mm jack is used for audio by default. You can select the audio device you want to use by using a settings option found in Settings -> System -> Raspberry Pi settings -> Audio device.
Q: How to use IR remote?
A: You can enable the feature by using a settings option found in Settings -> System -> Raspberry Pi settings -> Infrared remote.
You can place a keymap for your remote as /boot/rc_keymap.txt to be automatically loaded on boot. See available keymaps for reference. You can use ir-keytable -p all -t in rooted shell to figure out the keycodes for the remote you’re using.
Q: How to use RTC?
A: You can enable the feature by using a settings option found in Settings -> System -> Raspberry Pi settings -> Real time clock.
System time is automatically read and set from the RTC on boot once you’ve enabled the feature. You need to write the system time you want to use to the RTC in rooted shell:
hwclock -w -f /dev/rtc0
Q: How to use SSH?
A: You can start/stop the built-in SSH server by using a settings option found in Settings -> System -> Raspberry Pi settings -> SSH.
Android doesn’t have user accounts with passwords so key based authentication is used with SSH instead. Necessary keys are generated on the first boot and you need to pull the private key to your computer (or alternatively you can push your own previously generated keys to the device). See Settings -> About tablet -> IP address for your device’s IP address (192.168.0.100 is assumed here). Enable Settings -> System -> Raspberry Pi settings -> ADB.
adb connect 192.168.0.100
adb root
adb pull /data/ssh/ssh_host_ed25519_key my_private_key
chmod 600 my_private_key
ssh -i my_private_key root@192.168.0.100
It’s recommended to disable adb after this.
Q: How to boot from USB device?
A:
- Install EEPROM that supports booting from USB
- Write image to your USB device as above
- Mount the USB device on your computer and make following changes to /boot/config.txt under ‘Boot device’ section:
#dtoverlay=android-sdcard dtoverlay=android-usb - Plug in the USB device to your Raspberry Pi, remove any sdcard, and boot
Q: How to boot to TWRP recovery?
A: AOSP doesn’t have reboot to recovery option in power menu. You can boot to TWRP by selecting option in Settings -> System -> Raspberry Pi settings -> Reboot to recovery.
If mouse cursor doesn’t appear, try replugging your mouse.
Q: How to boot out of TWRP recovery?
A: You can boot out of recovery by simply selecting reboot to system option in TWRP.
Q: My device keeps booting into TWRP recovery. What should I do?
A: If you have GPIO21 connected to ground (or if you have something drawing power from it) your device will always boot to TWRP recovery (see FAQ section about DIY power button). If you have a hardware failure on GPIO21 you can edit /boot/config.txt to remove the GPIO21 related logic (see ‘Ramdisk’ and ‘Graphics acceleration’ sections).
Q: How to install Magisk?
A:
- Download KonstaKANG-rpi-magisk-v28.0.zip (sha256:41be2439544777942432b968be66ae48c523b6649bc3b5e7c57b189c7cee0c15) and save it to your device’s internal storage or use an external USB drive
- Download Magisk-v28.0.apk
- Boot to TWRP recovery (see FAQ)
- Install KonstaKANG-rpi-magisk-v28.0.zip from your selected storage
- Boot out of recovery (see FAQ)
- Install Magisk-v28.0.apk using Android’s built-in file manager/
adb install/etc. - Ignore suggestions to reinstall Magisk within the app and/or warning about the installation method
Q: How to install Google apps?
A:
- Download GApps-12.1-arm64-xxxxxxxx.zip and save it to your device’s internal storage or use an external USB drive
- Boot to TWRP recovery (see FAQ)
- Install GApps-12.1-arm64-xxxxxxxx.zip from your selected storage
- Wipe -> Factory reset!
- Boot out of recovery (see FAQ)
- Register Google Services Framework Android ID if/when prompted
23.9. changelog:
- initial release (android-12.1.0_r22)
- Mesa 22.1.7
- Linux 5.10.144 kernel
- Android security patch level: 5 July 2022
Previous builds: